How To Make 3D Perspective Text
This tutorial shows you some basic techniques using different blending options to get a 3D text that is in perspective, with a nice end result which really stands out.
Step 1: First of all create a new document whatever size you like (for this I have used size 500 x 500)
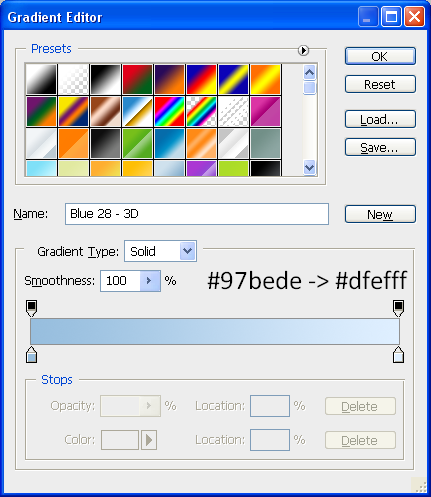
Step 2: Select the gradient tool from the left hand toolbar and set the gradient to the colours and settings as shown below (or you can use your own colours, whichever suits you more)
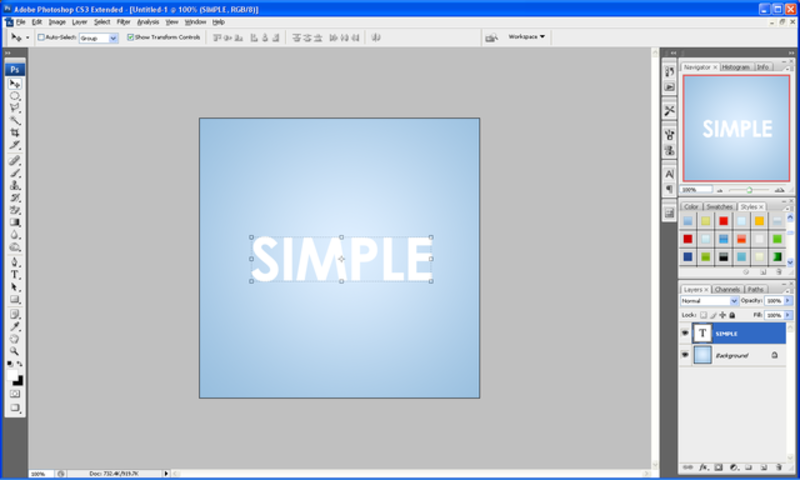
Step 3: With the gradient set choose the text tool and write out the text you want, for best results use a thicker text (I used Century Gothic, set to bold) and then resize to whatever size you need.
Step 4: Right click on the text layer and choose Rasterize Layer which will convert the text to pixels, now click on one of the little boxes that surround the text like below:
![]()
Step 5: Now right click on the text and it should bring up a menu like below, from this choose perspective:
Step 6: Click and hold on the bottom right corner and drag downwards as shown below:
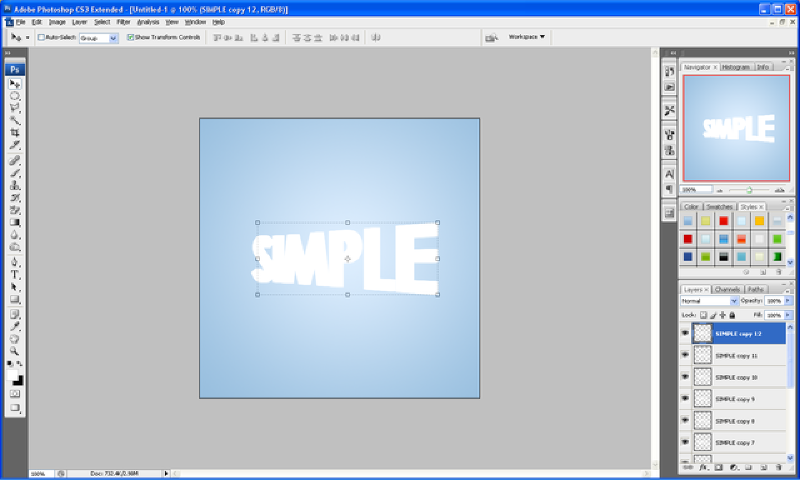
Step 7: When done click the tick button on the top toolbar to apply changes and now simply press CTRL + J (this will duplicate the layer) and press the right arrow once, repeat this as many times as you like or until it looks something like below (I did it 12 times), so this is the order…
CTRL + J, ->,
CTRL + J, ->,
etc…
Result:
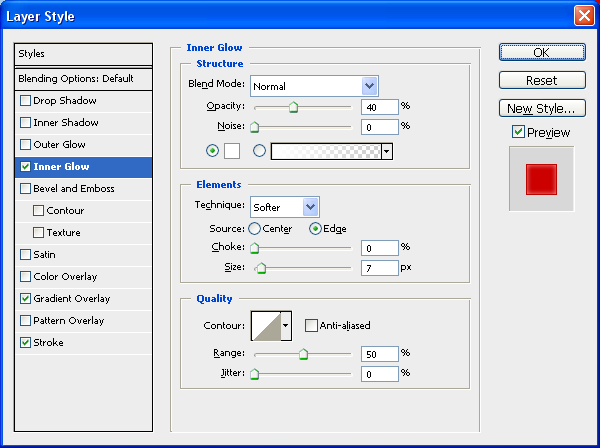
Step 8: Now get the first layer of text again and drag to the top of all the other layers so it is the top layer, this is where we add some colour to the text, double click on the original layer and this will bring up the “Blending Options Menu” when this appears use the settings as shown below: (alternatively you can use your own colours)
Inner Glow:
Gradient Overlay:
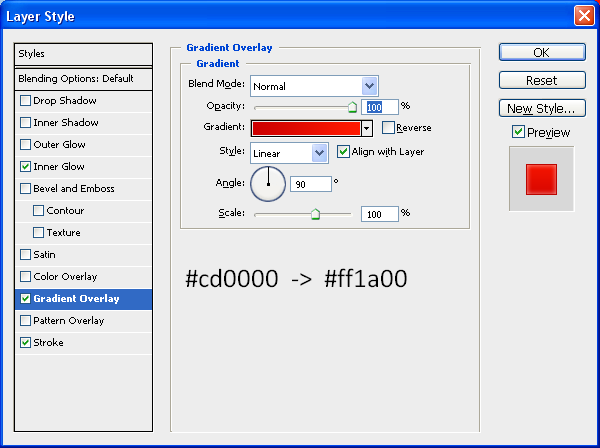
Stroke:
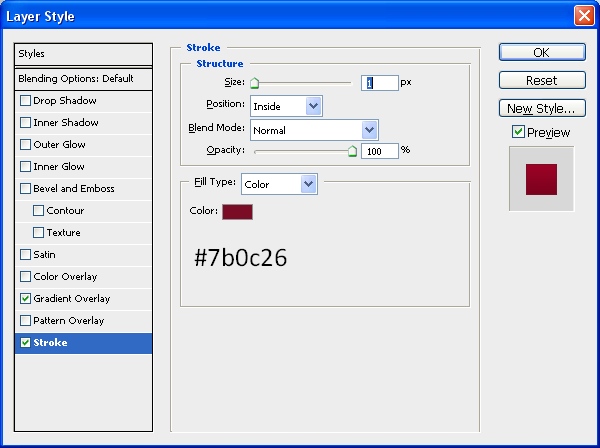
Step 9: Now select all of the other duplicated layers (not the original or the background) and right click and choose “Merge Layers” this will put all of the chosen layers into just one layer, now double click on the merged layer which will again bring up the “Blending Options” now use the settings as below or again you can use your own colours:
Gradient Overlay:
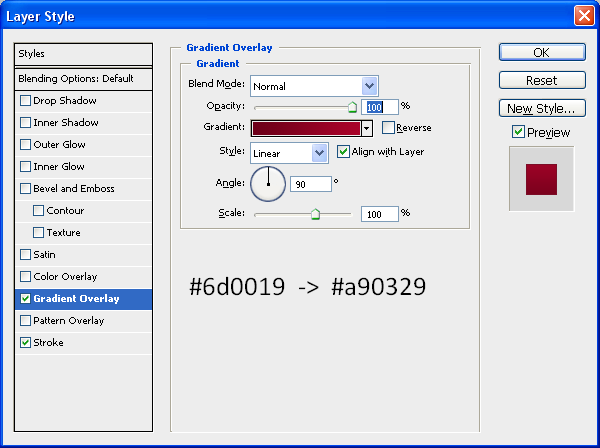
Stroke:
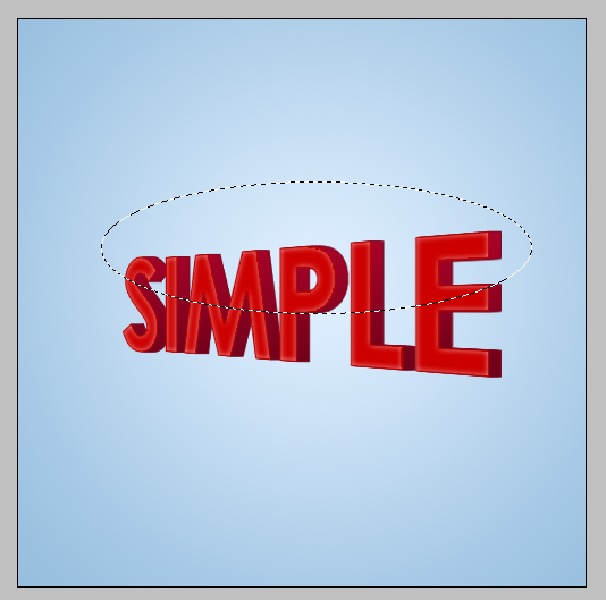
Step 10: To finish this text off simply create a new layer above all of the other layers and choose the “elliptical marquee tool” and make a selection like the one below:
Step 11: Now fill this selection in with white, and now hold CTRL and click in the box next to the layer name on the original layer (this should select the outline of the text) now press CTRL + Shift + I, this will invert the selection and with the new layer still selected press delete this should delete the white that is not wanted and leave you with something similar to below:
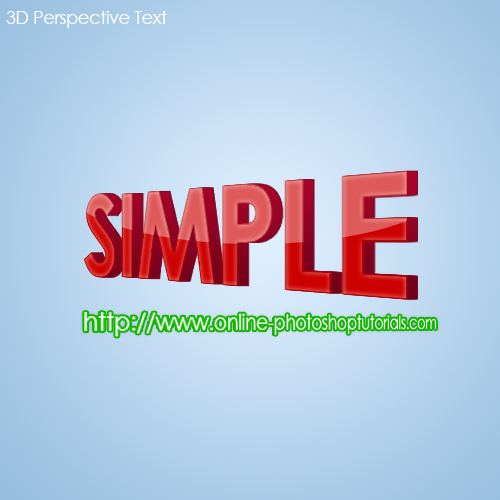
Now set the new layer opacity to 35% using the bar on the top of the layers window which says “Opacity” and then you will have your finished text 3D text perspective:
Finished Result:
If you have had any problems with this tutorial and would like some help then don’t hesitate to contact me either by leaving a comment below or e-mailing me at: stevie489@googlemail.com


fantastic toturial, thank you very much!
i m v grateful to u , i have performed this tut and it works amazingly..
it is a greate lesson , and i have many lessons on many graphic programs , i hope i can share them with u
akr
thanks for the excellent tutorial