How To Make An Aqua Button
This tutorial is “How To Make An Aqua Button”,
It is a very good tutorial and explains fully what to do,
I have tried and tested it and it works fine for me, any problems let me know and I will do my best to help you.
1. Create a new 340×340 pixel document and name it Aqua Button. Now make a pattern of your choice and make it the background. Then show channels, and create a new channel.
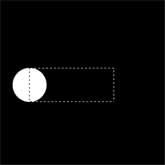
2. Next in the new ‘alpha 1′ channel, select the elliptical marquee tool, and make a circle with 70 x 70 pixel dimensions. This will be the rounded edges of your button. Next select the rectangular marquee tool. You will want to start the selection right near the top middle part of the circle, and then drag it out to the right until the height is 70 pixels as well. If it’s not completely aligned with the circle after your done selecting, then use the arrow keys to adjust then fill, the selection with white. See image to the right.
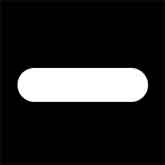
3. Now you will have something like a rectangle, but one end is a half circle. Now make a selection of the half circle and some of the rectangle, like this:
Now you want to flip the selection horizontally, then click and drag the selection to the right so it matches up. If you are having trouble matching the edges up, Try holding down shift, it locks the image to the x, y and x+y axis while dragging. Then you want to align the image to the vertical and horizontal centers.
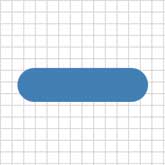
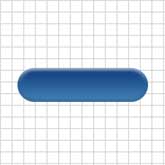
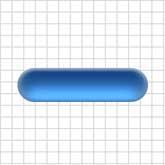
4. Now you want to load the selection from the alpha channel. Then show layers, and create a new layer and name it ‘button back’. Show colors, and use the color [R: 66, G: 127, B: 180]. Then fill the selection. Now my pill is about 270 width by about 70 height. Now remember that if you are doing a smaller size, you might get a wierd outcome. Best idea is to make it the same size as mine, and shrink it later. Now deselect.
5. Now in the next few steps we are going to apply many layer blending options to the button back layer. First off we will apply bevel and emboss with these settings
6. Press D, to reset foreground color to black. Now apply a gradient overlay with these settings
In the Gradient box, Select the Foreground to Transparent (Second Option). Note that the box may not be black, but select it anyways.
7. Now the last two styles you can add. The first one is an inner shadow with these settings
Then finally do satin with these settings

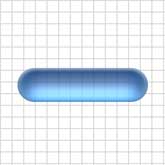
8. Now load the selection from the ‘button back’ layer and contract the selection by 10 pixels. Then contract the selection by 6 pixels. Then feather the selection by 7 pixels. Now you are going to Layer > New Layer.., and a window should pop up. You want this window to popup, that’s why we create a new layer by going through the menu. Now in this new window, name it ‘bottom highlight’ make the Mode: Color Dodge, and then check the box ‘Fill with Color-Dodge-neutral color (black). Now press ok, then Press D then X to reset the foreground and background colors. Now fill the selection with white. Then change the fill percentage to about 40%. Then hold shift and press the down arrow twice. Then load the selection from the ‘button back’ layer again, and inverse the selection, then press delete. Now deselect.
9. Next, create a layer mask on the ‘button back’ layer. Now load the selection from the ‘button back’ layer, and contract the selection by 10 pixels, then contract it by 6 pixels, then feather it by 7 pixels. Now click on the layer mask.
and fill the selection with 45% Gray [R: 161, G: 161, B:161]. Then deselect, and gaussion blur the layer mask about 18 points.
10. Next, select the rectangular marquee tool, and create a selection like this:
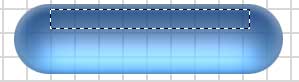
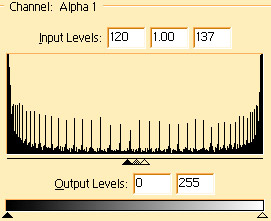
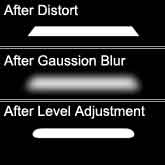
which is 200 pixels wide and 20 pixels tall. Then show channels and create a new channel. Now fill the selection (with white). Deselect, then distort the white area like this, and hold down Ctrl + Alt + Shift for the effect to be equal on both sides. Now apply a gaussion blur with settings [Radius: 10 pixels]. Now you will want to adjust levels with these settings
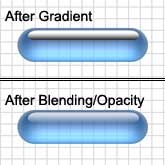
11. Now load the selection from that alpha channel and show layers. Make a new layer, name it ‘upper highlight’. Press D to reset the foreground and background colors, then select the gradient tool. Now select the linear gradient, and drag from the bottom of the selection to the top, like so.
Then change the ‘upper highlight’ layers blending mode to ‘Screen’ and the opacity to 75%.
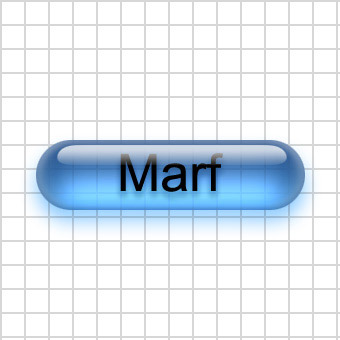
12. Finally, click on the horizontal type tool and then click in the button where you want text. Type in your text, and make sure your foreground color is black. Then you want to drag the type layer inbetween the ‘upper hightlight’ layer and the ‘bottom highlight’ layer. Now apply a drop shadow with these settings:
 .
.
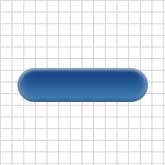
Almost done! Select the ‘button back’ layer and apply a drop shadow with these settings
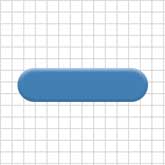
There you have a cool looking aqua/glass button or pill.
Tutorial From: http://www.webdesign.org
If this tutorial has helped you learn abit more about Photoshop then
why not tell other people about it, votes are always highly appreciated!!
Add A Comment